Whether you're an aspiring artist, a student working on a school project, or just someone who loves dogs and wants to learn how to draw them, you're in the right place. Learning how to draw a dog is not just a fun creative activity—it’s also a fantastic way to express emotion, build artistic skills, and maybe even create your own comic or cartoon.
What You’ll Need Before You Start Drawing
Before putting pencil to paper, make sure you’ve got a few basic tools. You don’t need anything fancy to begin drawing dogs, but having the right materials will help your work look cleaner and more professional.
Basic Materials:
✔️ Drawing paper or a sketchbook
✔️ Pencils (HB, 2B, 4B for light and dark shading)
✔️ Eraser (kneaded erasers are great for soft changes)
✔️ Pencil sharpener
✔️ Ruler (optional, for proportions)
✔️ Fine-tip pen or black marker (for outlining)
✔️ Colored pencils or markers (if you plan to color your drawing)
For digital artists, a tablet or drawing pad with stylus will work just as well—just follow the same steps below using your favorite digital app (like Procreate, Krita, or Photoshop).

Step-by-Step Guide: How to Draw a Cartoon Dog (Beginner Level)
Let’s begin with a simple cartoon dog. This version is cute, easy, and ideal for kids and beginners.
✅ Step 1: Draw the Head
✔️ Start with a large oval or circle in the middle of your paper. This will form the dog’s head.
✔️ Lightly sketch a vertical and horizontal line across the circle. This will help you place the eyes and nose accurately.
✅ Step 2: Add the Facial Features
✔️ Draw two medium-sized ovals on either side of the vertical line for the eyes.
✔️ Inside each eye, draw a smaller black circle for pupils. Add a small white circle for light reflection to make your dog look lively.
✔️ Between the eyes and slightly lower on the vertical line, draw a small upside-down triangle. This is the nose.
✔️ Below the nose, sketch a short vertical line and add a wide curved “W” shape to form the mouth. You can even add a little tongue!
✅ Step 3: Draw the Ears
Depending on the breed or look you want, ears can be:
✔️ Long and floppy (like a beagle or golden retriever)
✔️ Short and perky (like a corgi or French bulldog)
✔️ Pointy and alert (like a German shepherd)
Sketch the ears as two shapes on top or the side of the head. Keep it symmetrical.
✅ Step 4: Sketch the Body
Below the head, draw a slightly elongated oval or pear-shaped body.
This part doesn’t need to be perfect—just enough to represent a cartoon body. Leave space below for legs and paws.
✅ Step 5: Add the Legs and Paws
✔️ In the front, draw two vertical lines going downward and end them with round or oval shapes for paws.
✔️ Behind those, sketch two back legs (slightly curved to show the natural dog posture).
✔️ Draw small curved lines across the paws to indicate toes.
✅ Step 6: Draw the Tail
From the back of the body, draw a curled or wagging tail. Make it match your dog’s personality—fluffy, straight, or curly.
✅ Step 7: Add Details
Add:
✔️ Eyebrows for expression
✔️ A collar with a bone-shaped tag
✔️ Spots or patches to give personality
✔️ Optional: background like a doghouse or grassy park
Step 8: Outline and Color
Once you’re happy with your sketch:
✔️ Go over your lines with a pen or black marker
✔️ Erase all pencil marks
✔️ Use colored pencils or markers to color your dog
Congratulations—you just drew your first dog!

How to Draw a Realistic Dog (Intermediate Level)
Once you’ve mastered cartoons, you can move to realistic dogs. Here’s how to build a lifelike drawing step by step.
Step 1: Understand Dog Anatomy
Dogs are built differently than humans. Study reference images to understand:
✔️ Head shape (depends on breed)
✔️ Neck and torso length
✔️ Position of legs
✔️ Curvature of tail
✔️ Fur textures
Step 2: Block in Basic Shapes
Start with simple geometric shapes:
✔️ A circle for the head
✔️ A rectangle or bean-shape for the torso
✔️ Ovals for joints and paws
✔️ Lines for the legs and tail
This step is called "gesture drawing"—you’re building the skeleton.
Step 3: Refine the Outline
Once your base is in place:
✔️ Define the dog’s facial structure (muzzle, jawline, brow)
✔️ Add muscle shapes to legs and chest
✔️ Sketch the ear structure based on breed
✔️ Add the tail with natural curve
This outline should now resemble a realistic dog form.
Step 4: Add Texture and Fur
Fur is where realism shines:
✔️ Use short, directional pencil strokes
✔️ Darken shaded areas under ears, chest, and legs
✔️ Use lighter pencil pressure for light areas
✔️ Study reference photos to see how the fur lays
Step 5: Shade and Add Dimension
Light sources matter! Decide where the light is coming from and:
✔️ Shade opposite that light source
✔️ Blend using tissue or blending stumps
✔️ Add highlights with an eraser
✔️ Use layering techniques to build depth

How to Draw Specific Dog Breeds
Want to draw a pug, husky, or dachshund? Here are tips for a few popular breeds:
Labrador Retriever:
✔️ Large, round head
✔️ Floppy ears
✔️ Muscular build
✔️ Short, straight fur
✔️ Friendly face with soft eyes
French Bulldog:
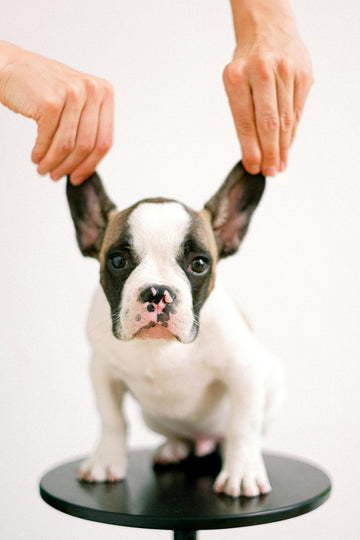
✔️ Large bat-like ears
✔️ Short snout
✔️ Compact body
✔️ Wrinkled face
✔️ Big, expressive eyes
Dachshund:
✔️ Long body
✔️ Short legs
✔️ Droopy ears
✔️ Thin, whip-like tail
✔️ Curious, alert expression
Siberian Husky:
✔️ Wolf-like face
✔️ Thick fur and bushy tail
✔️ Pointed ears
✔️ Blue or heterochromatic eyes
✔️ Graceful, athletic posture
Use breed-specific photos as references to capture accuracy.

Add Personality to Your Dog Drawing
A drawing becomes memorable when it tells a story. Make your dog stand out by adding character!
Ideas:
✔️ Add glasses, a bowtie, or a funny hat
✔️ Give your dog a bone, ball, or favorite toy
✔️ Show emotion (happy, surprised, sleepy) using eyes and mouth
✔️ Add background scenery (dog park, couch, garden)
Common Dog Drawing Mistakes (and How to Fix Them)
❌ Mistake 1: Eyes Too Far Apart
Fix: Use light guidelines to keep facial features balanced.
❌ Mistake 2: Legs Too Straight
Fix: Study how dogs stand—most breeds have slightly curved legs and bent joints.
❌ Mistake 3: Flat Fur
Fix: Use varied strokes and layers to make fur look 3D.
❌ Mistake 4: Forgetting Anatomy
Fix: Always block in the basic shapes before adding details.
Practice Exercises to Improve Fast
✅ Draw 5 different dog heads daily (focus on ears, eyes, nose)
✅ Try gesture drawings from dog photos (30 seconds per pose)
✅ Sketch from real life—visit a dog park or draw your pet
✅ Challenge: Draw one dog from memory, then compare with a reference
Bonus: Turn Your Dog Drawing into a Digital Artwork
Once you've sketched a dog you love, consider:
✅ Scanning it and coloring digitally
✅ Adding text for a custom card or sticker
✅ Using it as a logo or tattoo design
✅ Posting your progress online for feedback and community

Conclusion
You don’t need to be a professional artist to learn how to draw a dog. Whether it’s a cartoon pup with floppy ears or a stunning realistic husky, every drawing you create helps you improve. Like anything else, the more you draw, the better you’ll get.
So don’t worry if your first dog looks more like a potato. Keep drawing. Keep practicing. And most of all—have fun.
Remember: dogs aren’t just fun to play with—they’re fun to draw, too.


